Dual Pivot Brake Service
This article will discuss dual pivot calipers arm adjustment from brake attachment to the frame, pad adjustment to the rim, pad clearance, and pad centering.
Preliminary Info
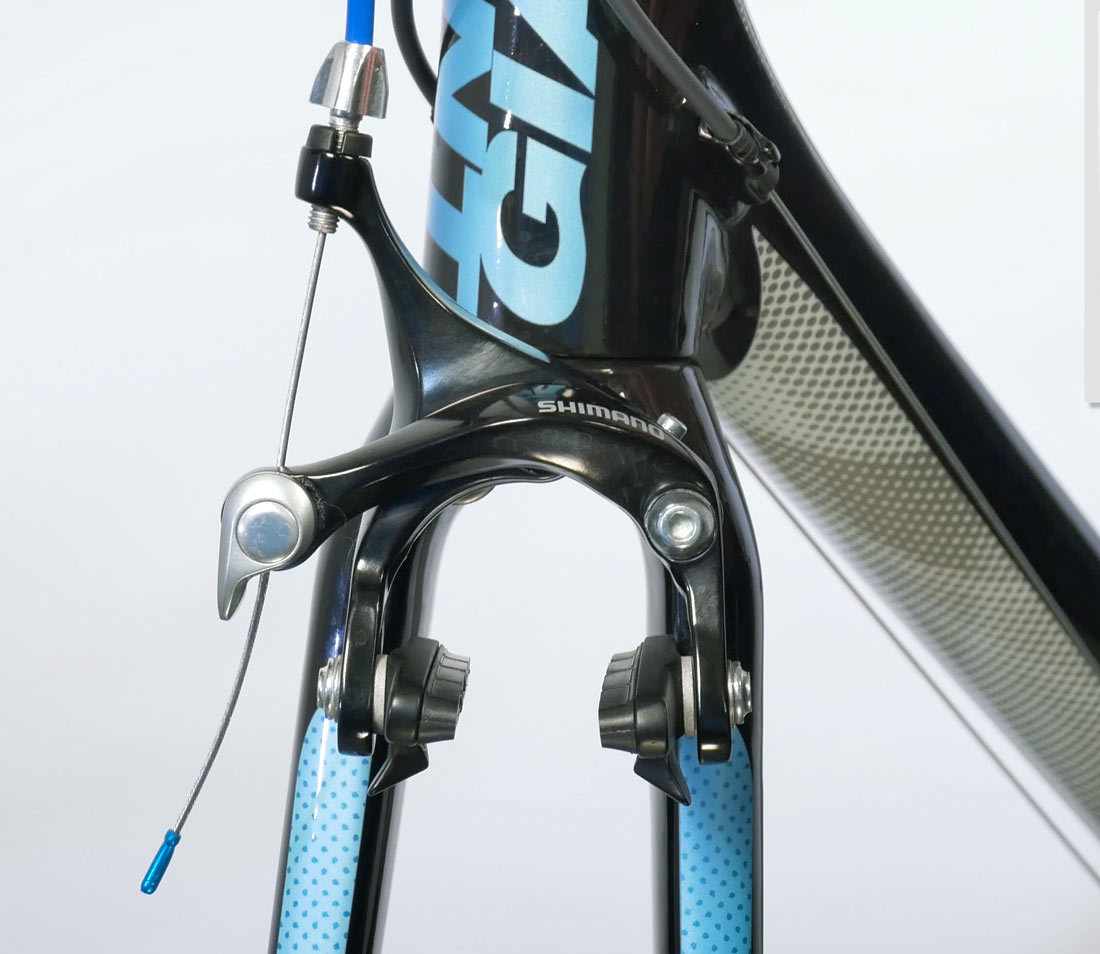
The dual pivot caliper rim brakes are used on many modern road bicycles. It is a combination of a “center-pull” and a “side pull” brake. One caliper arm has its pivot off of wheel center, the other arm pivot directly over the wheel center.
Install Caliper
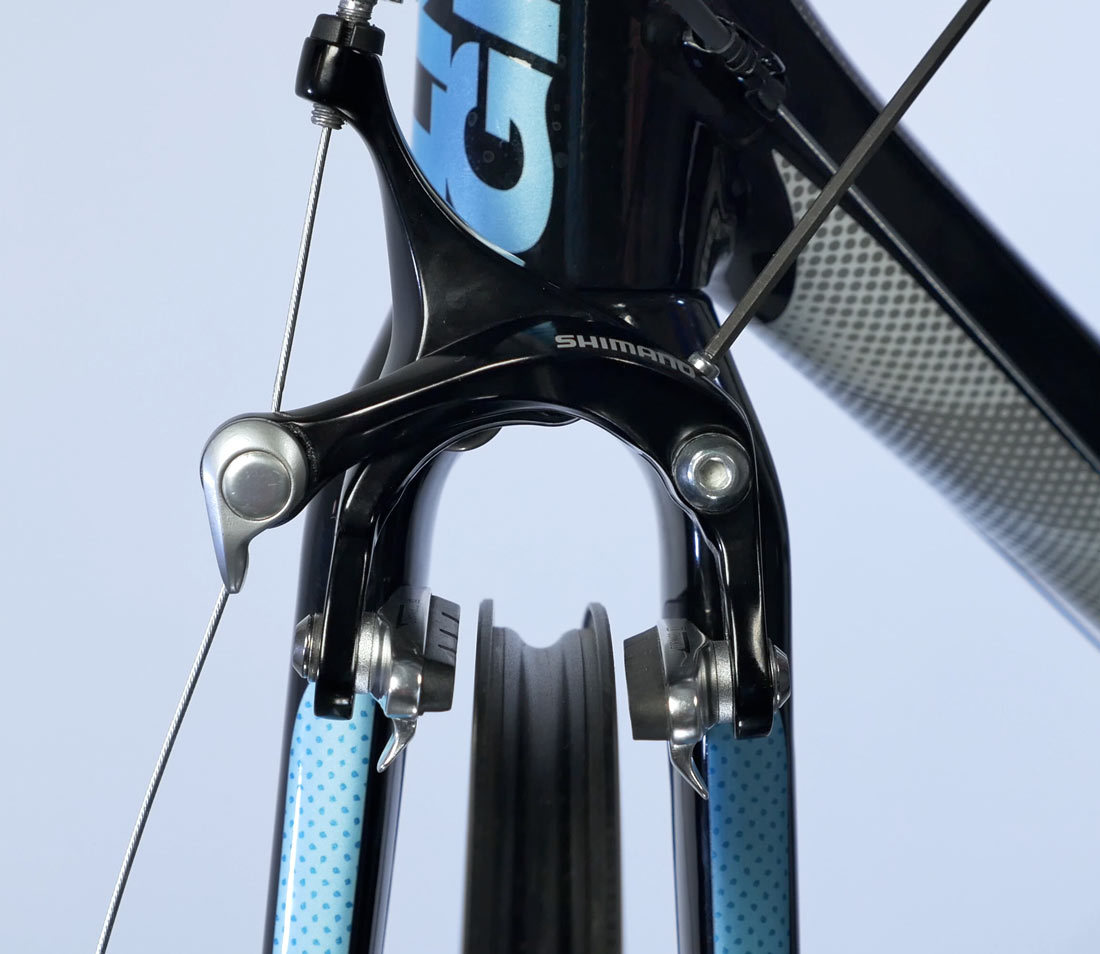
The calipers secure to the frame or fork with a threaded stud and nut. Hold the brake centered to the rim, and secure the nut to manufacturer’s specifications, typically 6–7 Nm. Hold the calipers close to center on the rim, as this will assist pad setting later.
Install Cable
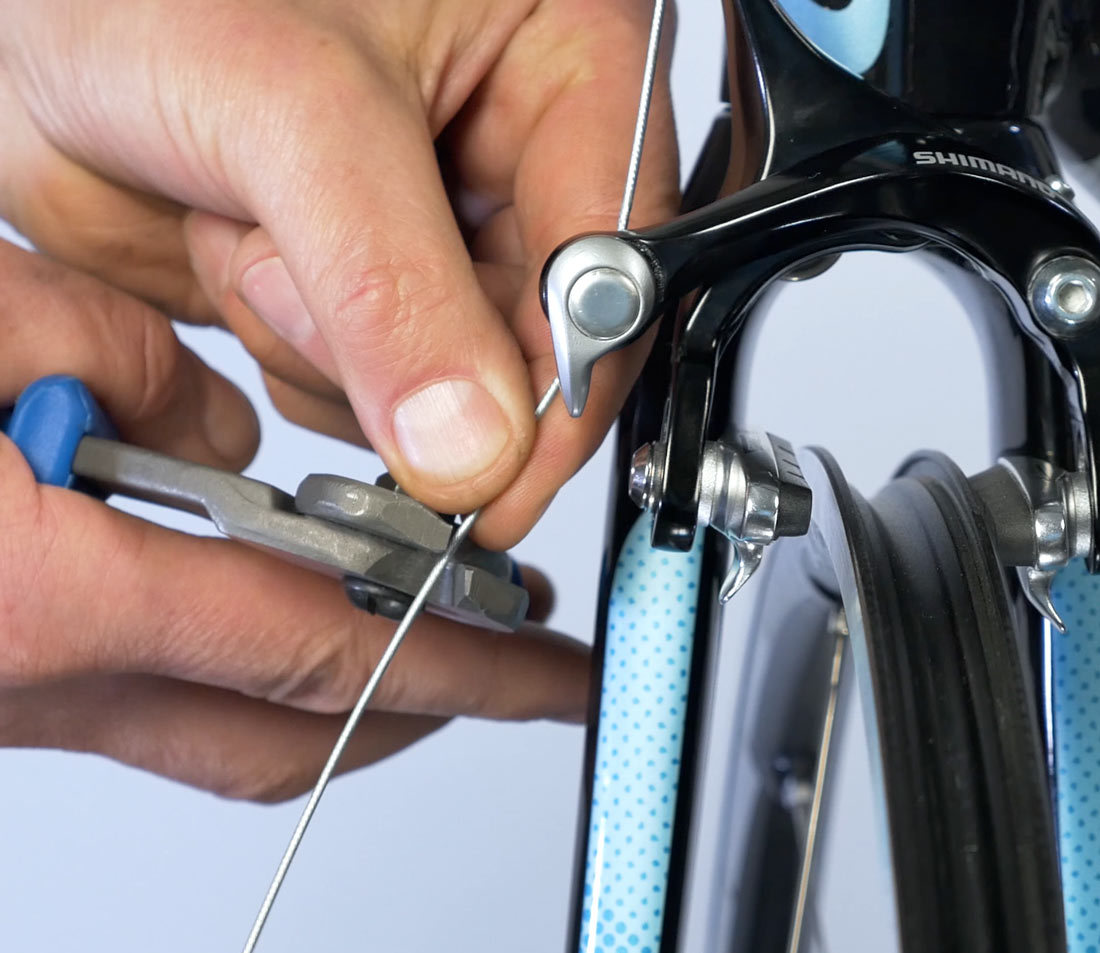
It is useful to use the brake cable to hold the pads close to the rim. This makes adjustment easier.
Feed the cable through the barrel adjuster, and through the pinch mechanism. Back the barrel adjuster out two or three turns to allow for later adjustments. Make sure the quick-release is in the closed position. Squeeze the pads to the rim and secure the pinch bolt to manufacturer’s specifications, typically 5 Nm.
Adjust Pads to Rim
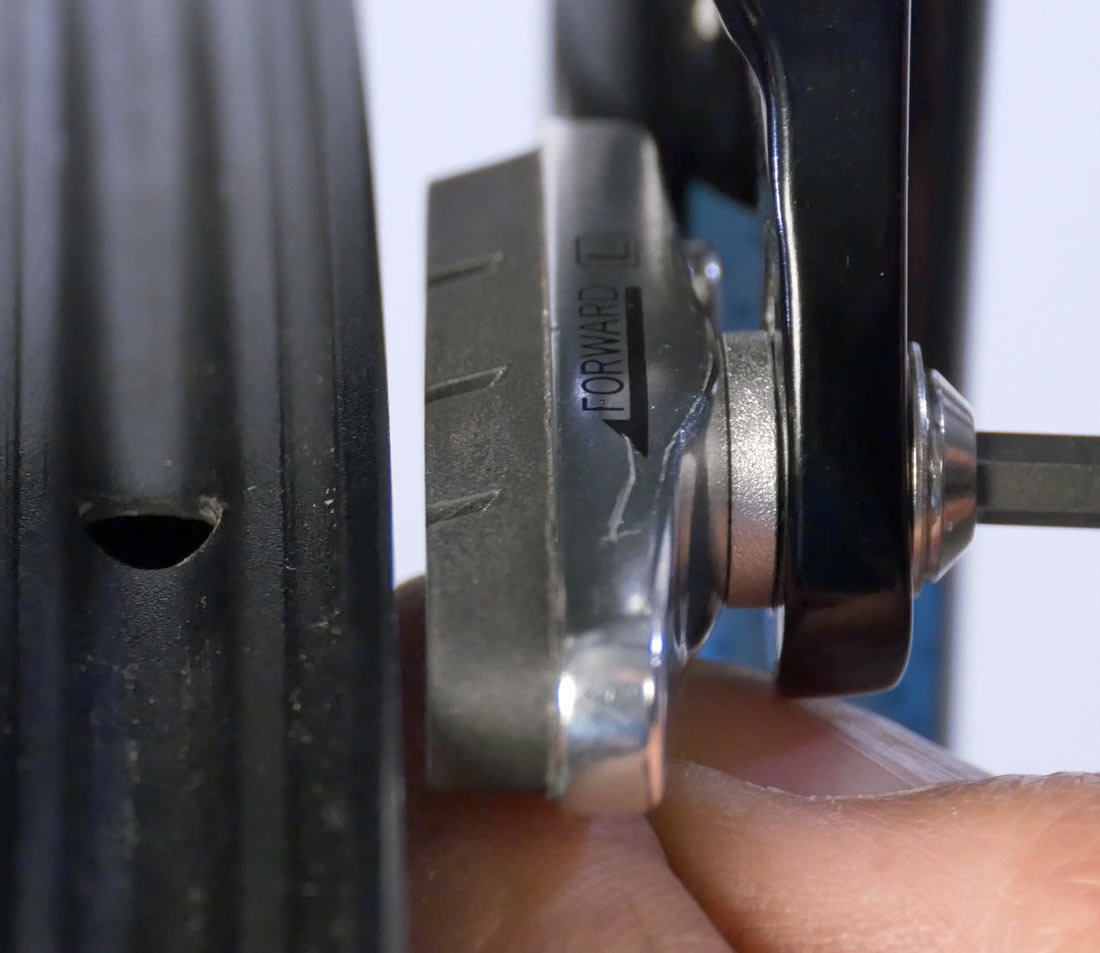
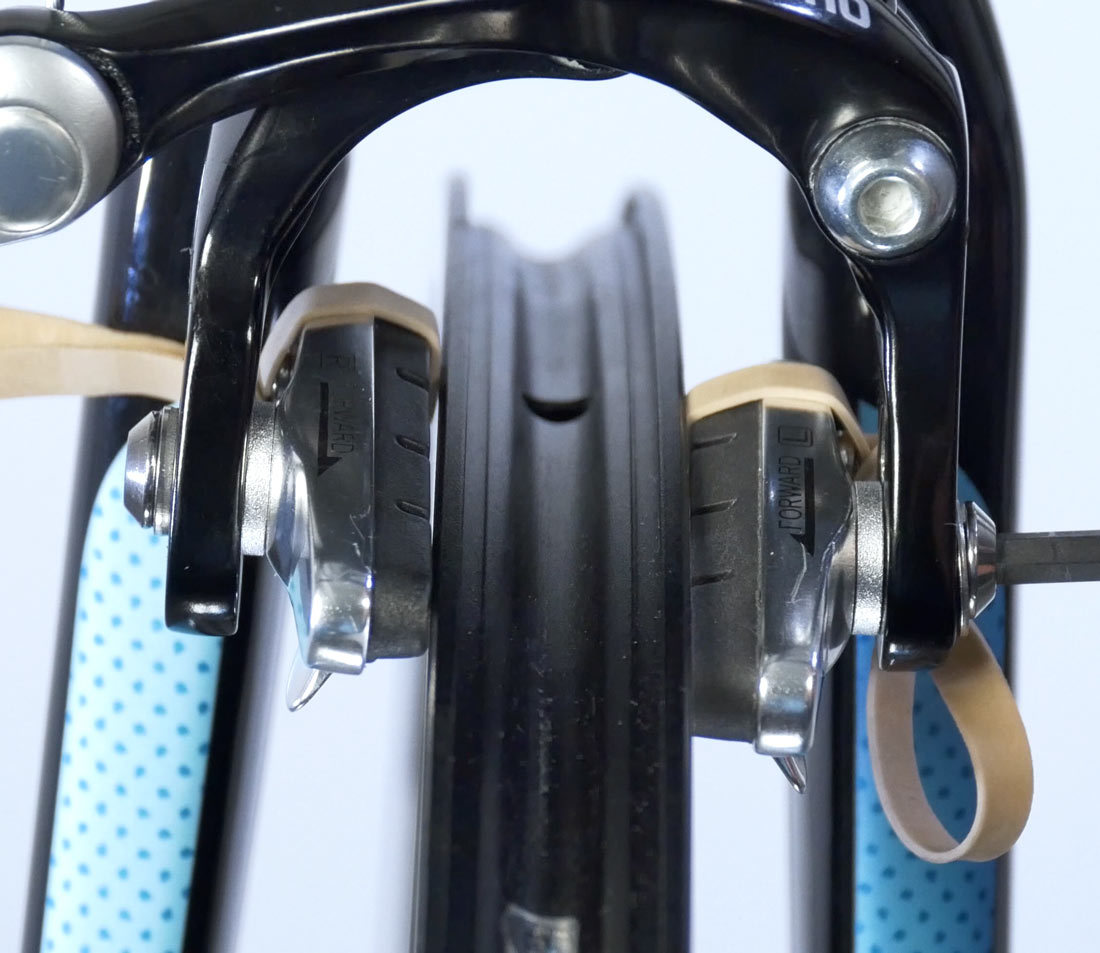
For dual pivot brakes, each arm pivot location is different and pads move in different arcs as they approach the rim. The left side arm (as seen from in front of the brake) acts as a side pull. This pad swings downward as it travels toward the rim. As this pad wears thinner, it will travel downward even more. The right side acts as a center pull. The right pad will travel upward as it approaches the rim.
Because of these different pad arcs, set the right pad lower on the rim braking surface, and the left pad high on the braking surface.
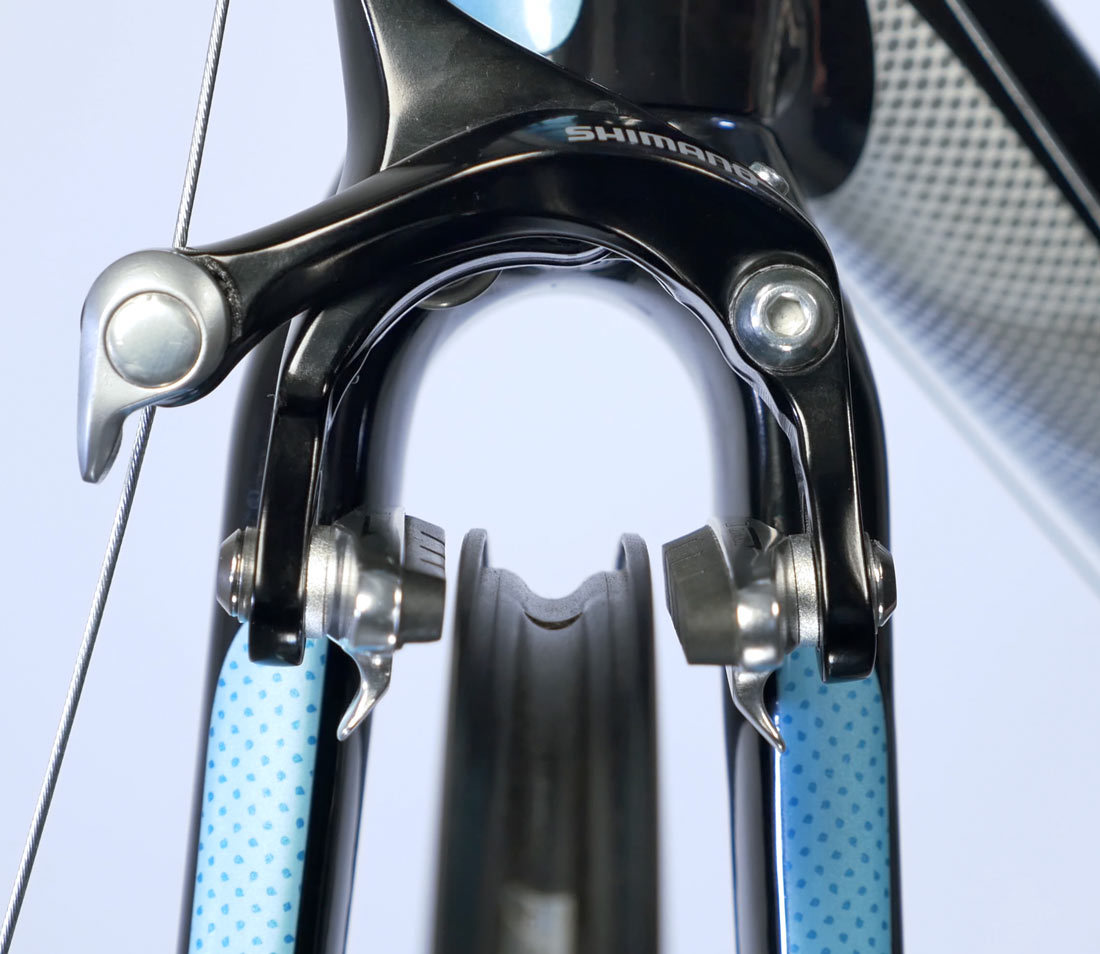
Most dual pivot brakes use a pad system with convex and concave surfaces. This system permits adjustment for how the pad face strikes the rim.
Adjust pads for flat face of pad strikes flat face of rim surface. Adjust for front and back edge of pad for even, and the pad is not tilted.
The brake may need to be adjusted for “toe.” Toe is an adjustment the can reduce brake squeal. The simplest test first is to see if the brake squeal when used. If there is not squeal, toe is not required.
Squeal is a flexing back and forth of the brake caliper on the rim surface, creating a resonance. This effect can be reduced if the front edge of the pad is angled to contact first, leaving a slight gap at the trailing edge.
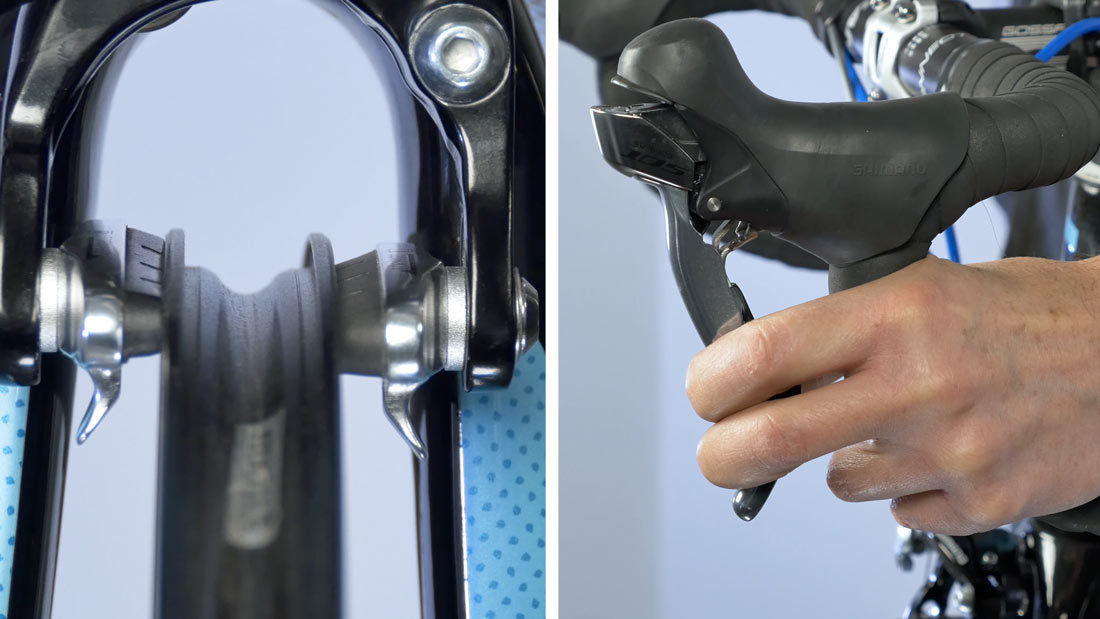
Another method is to create shim at the back edge of the pad using a rubber band. This technique only works if the pads use the convex-concave spacer system. Squeeze the lever gently and loosen the pad screw. The pad will self align to the rim from the pressure. Secure the pad, remove the rubber band and check for toe.
NOTE: It is generally not recommend that dual pivot brake arms be bent for “toe.” Install the convex-concave pads that permit toe adjustments. Otherwise, file the pad so there is a slight gap at the back.
Set Pad Clearance
Squeeze lever with force to settle in cable and housing and to test security of cable pinch bolt. Use barrel adjuster to adjust pad clearance by feel at the lever.
A brake that is set too tightly make pad centering difficult and will likely rub the rim during a ride. In this case bring the barrel adjuster down into the brake, creating more cable slack to move the pads away from the rim.
On a brake that is too loose, it will nearly contact the handlebar, resulting in poor stopping power. Turn the barrel adjuster counterclockwise, drawing out slack and bringing the pads closer to the rim.
Normally, front and rear brakes are set to feel the same.
Centering
View pad centering to rim. Dual pivot brakes commonly have a centering screw on one arm. Turning the screw clockwise will draw both pads to the side of brake with the screw. Loosening the screw will move both brakes toward the side opposite the screw.
Some dual pivot models lack a centering screw option. In these cases, move both the brake mounting nut and brake body together. Use brake centering wrench if there is a centering flat on the brake.

Cut Cable & Cap
Finish by trimming the cable and installing an end cap.
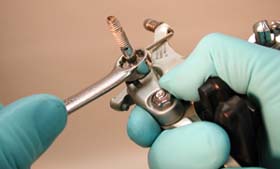
Caliper Arm Pivot Adjustment
If there is excessive play in the caliper arms, adjust at the brake pivot.
Because each arm has a separate pivot, each arm pivot is adjusted separately. Neither arm should have play, or a back and forth knocking. Additionally, neither arm should bind as it moves. The caliper arm bridge behind each arm is threaded for each arm pivot bolt. Behind each pivot bolt is a locknut. Dual pivot use a spring to push open the side-pull type arm. A setscrew in the side-pull type arm pushes on the center-pull arm to open it.
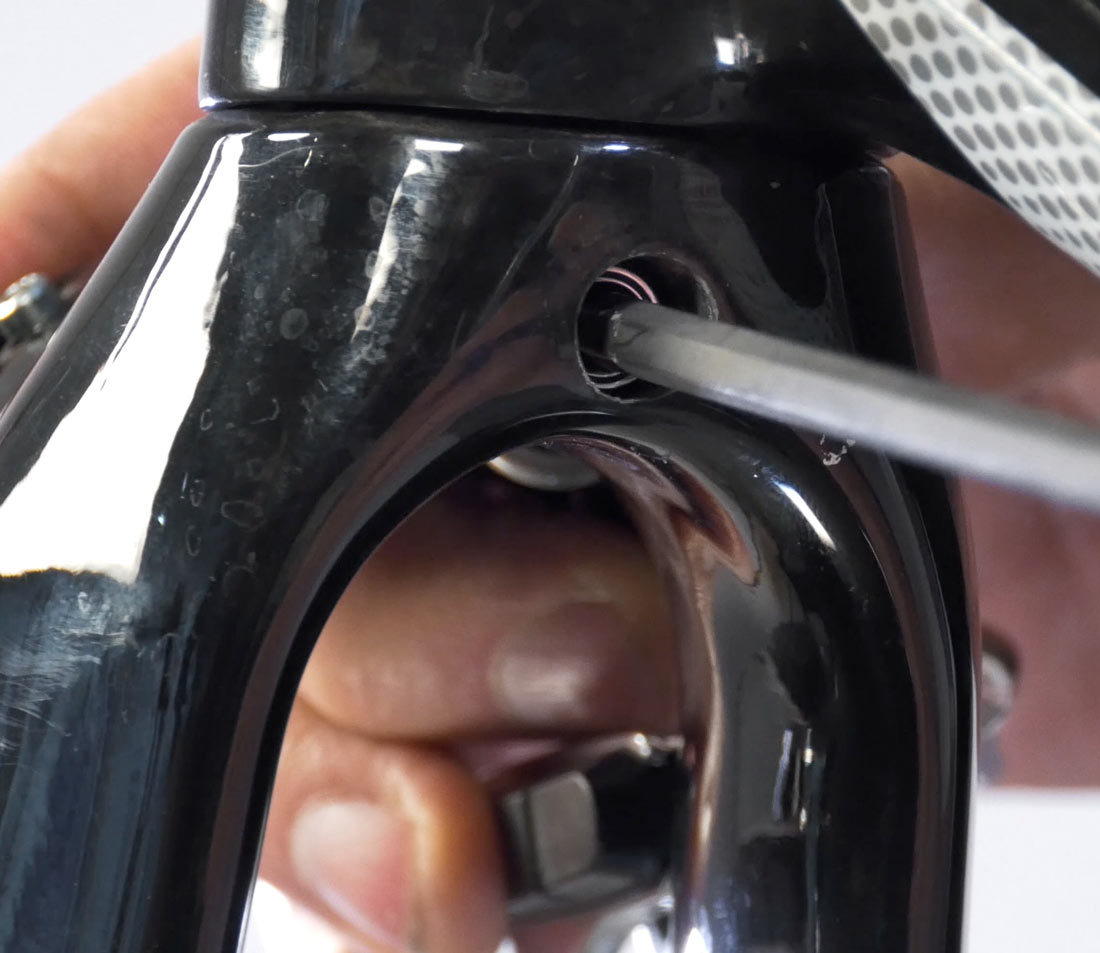
- To adjust the center pivot of the right arm, begin by removing the brake from the bike.
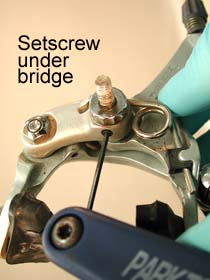
- Loosen set screw located under bridge. Not all brands and models use a setscrew on this bridge. Campagnolo® uses a setscrew in the locknut behind the brace.
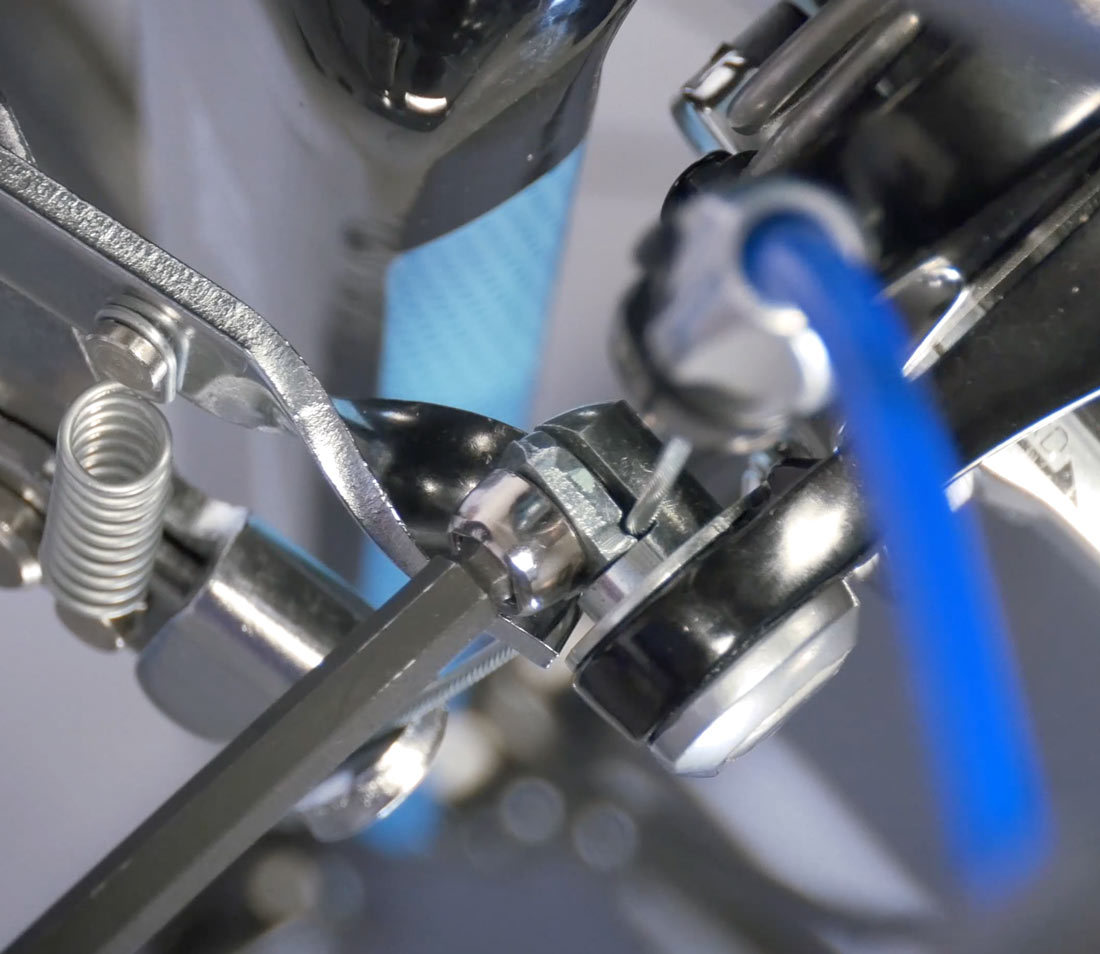
- Release spring tension by un-hooking the spring from the right caliper arm (center-pull type arm). Use care not to damage plastic spring-guide.
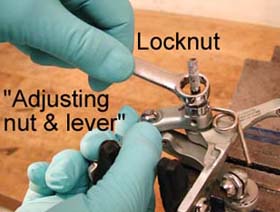
- Loosen locknut at base of mounting bolt. It is not necessary to remove locknut. Shimano® typically uses a 12-point 13mm nut. Other brands vary.
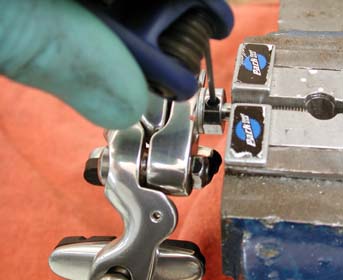
- Mount a L-shaped hex wrench vertically in a vise. This will act to hold the pivot bolt and free up your hands.
- Pivot center pull side inward to expose center bolt. Place brake down on hex wrench. Center bridge is threaded, and can also act as its own lever. Turn brace clockwise slightly (10-15 degrees) to tightened adjustment. Hold brace and fully secure locknut (about 70 inch-pound torque). Test center-pivoting arm for knocking and play. Test arm for adequate free movement. If the arm binds, loosen locknut and loosen bridge slightly. Re-secure locknut and test again. Repeat as needed.
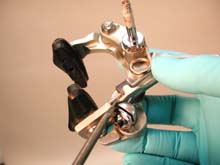
- Move caliper arm to full open position and re-attach return spring. Use care not to damage plastic spring-guide.
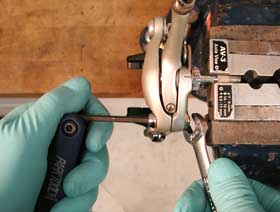
- Mount brake to frame, or use soft jaws in vise to hold mounting bolt.
- Use hex wrench to hold right-arm adjusting bolt, and loosen locknut on backside of arm. Tighten adjusting bolt slightly. Hold bolt and secure locknut fully. Test for play in arm, and squeeze arm to rim and test for adequate free movement.
Mount caliper to bike and adjust pads as described above.
Related articles
Brake Pad Replacement: Rim Brakes View Article
Side Pull Brake Service View Article